


LED Power Supply 101: From Basics to Sizing Lighting Projects
How do I calculate amperage? What is voltage measured in? Learn this and more LED power supply basics to properly power your lighting projects.
- -Understanding electrical concepts can simplify setting up home lighting projects.
- -An LED power supply is essential for connecting low-voltage LED lights to your home's high-voltage electrical system.
- -The three key specs for selecting a power supply are voltage, amperage, and wattage.
- -Voltage must match exactly between the power supply and the LED strip. Your driver's wattage should exceed your lights' with a safety margin.
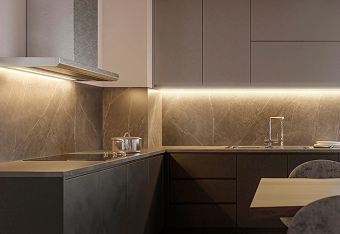
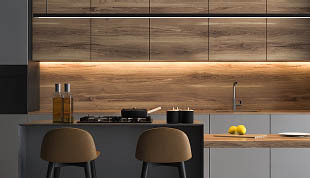
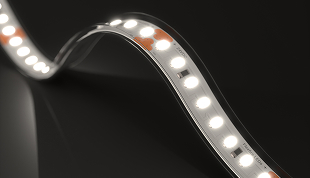
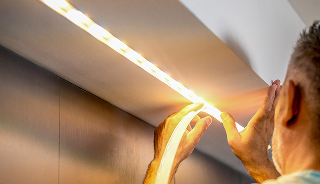
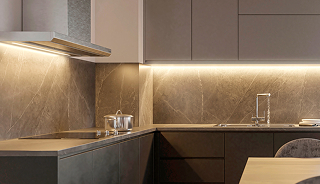
Imagine this: You've spent hours planning the perfect under-cabinet lighting for your kitchen, or maybe a movie-ready, accent backdrop for your TV setup. You ordered a roll of high-quality LED strips, and they finally arrive at your doorstep. You unravel them, you're excited, and then… Bang, you realize you need to plug them into something!
You look online to learn about how to power your lights, only to hit a wall of technical jargon before deciding to take the plunge. 12V versus 24V? Constant current or constant voltage? What on earth is an amperage rating, and why does everyone keep talking about an 80% or 90% rule?
If looking at power supply specs makes you feel like you accidentally stumbled into an advanced electrical engineering class, take a deep breath. You are not alone, and it's way simpler than it looks.
In this guide, we're going to break down what an LED driver actually is, as well as its big three terms—voltage, amperage, and wattage—using simple language. You'll also know exactly how to size a power supply for your project without breaking a sweat!
What Is an LED Power Supply? (& Why Do You Need One?)
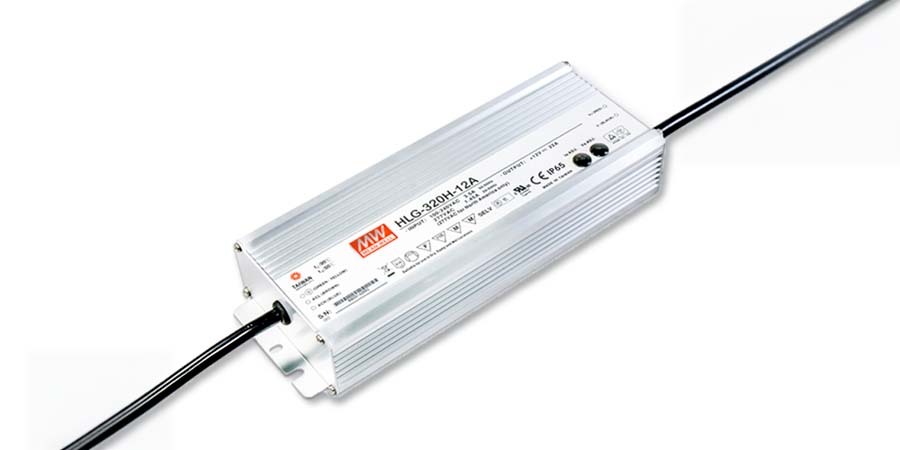
Let's start by understanding what this piece of hardware actually is. An LED power supply (often called an LED driver) is an electronic device housed in a protective enclosure. It acts as the crucial translator or bridge between your home's electrical system and your new lights.
If you were to open that metal or plastic box, you wouldn't find a simple battery or a solid chunk of metal. Instead, you'd find a densely packed printed circuit board (PCB) loaded with solid-state electronic components.
Because they are functional rather than aesthetic, power supplies are almost always hidden away out of sight in professional installations. They are tucked inside adjacent cabinets, placed behind false walls, hidden in closets, or installed inside accessible ceiling junction boxes. Because they are tucked away, you have to consider how they operate in confined spaces, which brings us to their electrical operation.
What Is the Function of a Power Supply?
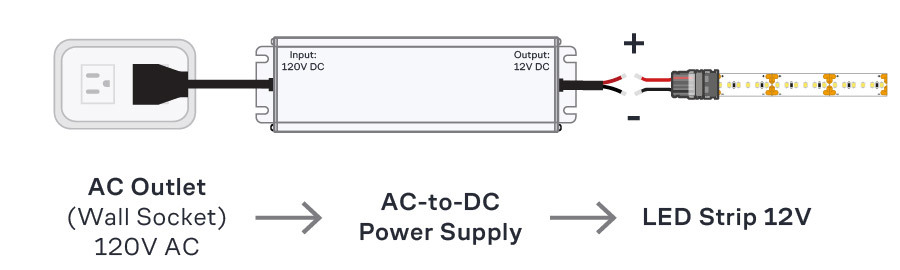
The standard wall outlets in your home blast high-voltage alternating current (AC) power—usually 120V or 240V, depending on where you live. Your LED strips, on the other hand, are precision-engineered, low-voltage devices that require smooth, steady direct current (DC) power (usually 12V or 24V).
If you tried to connect an LED strip directly to your wall outlet, it would break down immediately. The power supply steps down the massive wall voltage to a safe, usable level and converts the current type. Give them too much power, and they fry; give them too little, and they'll barely produce any light.
The Big Three Power Supply Spec Concepts
Now that you know what a power supply does conceptually, it's time to look at the actual numbers on the box. Choosing the right power supply boils down to balancing three core electrical terms: Voltage (V), Amperage (A), and Wattage (W).
If you get these three right, your installation will be flawless. Get them wrong, and you risk a system that doesn't light up—or, even worse, overheats or suffers permanent damage.
But since we can't actually see electricity moving through wires with the naked eye, these terms can feel a bit abstract. To make them tangible, we can replace the copper circuits with a widely used electrical metaphor: everyday plumbing pipes.
The Electricity Plumbing Analogy: How Does Electric Power Flow?
To make these invisible electrical forces easy to visualize, let's picture a standard backyard garden hose setup:
- Voltage (V) is the Water Pressure: This is the force pushing the water through the hose.
- Amperage (A) is the Flow Rate: This is the actual volume of water moving through the hose per second.
- Wattage (W) is the Total Water Delivered: This is the ultimate result—the total amount of water filling up your bucket at the end of a minute.
We've got the waterworks out of the way, so let's dive into a more technical look at these electrical concepts to help you understand how they influence your project overall and determine the right power supply for your setup.
What Is Voltage? (& Why It Must ALWAYS Match)
Let's start with Voltage: the electrical pressure that pushes current through the circuit and is measured in Volts (V). It is the steady baseline metric that determines which parts of your layout can communicate safely.
Before you can even look at numbers, you have to establish which neighborhood of electrical architecture your project lives in.
Constant Current vs Constant Voltage
If you browse online for LED power supplies, you'll see them divided into two major categories: Constant Current and Constant Voltage. This is a quick but very important technical detail you need to know.
Think of a Constant Current driver as a specialized power supply designed for high-powered LEDs, such as architectural spotlights. Instead of delivering a fixed voltage, it supplies a precise, unchanging amount of current while automatically adjusting its output voltage to meet the fixture's needs.
However, standard LED strip lights—including all of Flexfire's—work differently. They are built with components that regulate current internally, so they do not require a driver that controls current. Instead, they simply need a stable source of power at a fixed voltage. A Constant Voltage power supply provides exactly that.
The 12V & 24V Constant Voltage Standards (& the Golden Rule!)
Within the world of Constant Voltage, you will almost always encounter two standards: 12V and 24V. These low-voltage systems are incredibly safe to work with and perfect for all your DIY home lighting projects, whether you're powering a short accent section in your bedroom or a longer task run in the garage.
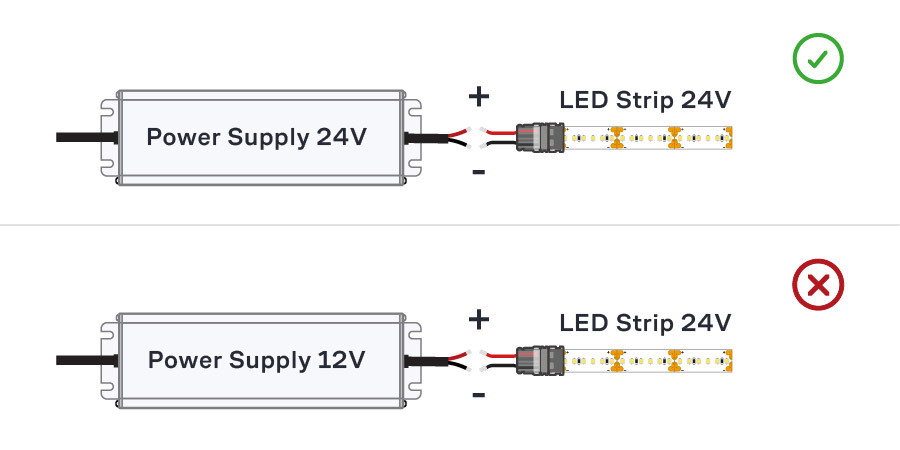
And once you know you're using a Constant Voltage system, you are ready for the single most important law of LED strip design: Your power supply voltage MUST exactly match your LED strip voltage.
For example, if you bought a 24V architectural LED strip for your living room shelf lighting, you must buy a 24V power supply.
- What happens if you use a 12V power supply on a 24V strip? The electrical "pressure" isn't high enough. Your lights will either be incredibly dim, flicker like a horror movie prop, or fail to turn on at all.
- What happens if you use a 24V power supply on a 12V strip? You are applying double the pressure the strip was designed to handle. You will instantly overheat the LEDs, likely pop the components, smell burnt plastic, and permanently ruin your investment.
Keep it simple: Match 12V to 12V, and 24V to 24V. No exceptions!
What Is Amperage?
Next up is Amperage, measured in Amps (A). If voltage is a strict rule, amperage is a bit more flexible, although only in one direction. Amperage represents current, or the volume of electricity your lights will actively pull from the power source.
Think of your LED strip as a guest at a buffet, and the power supply as the kitchen. The kitchen needs to have at least as much food as the guest wants to eat, but it's perfectly fine if the kitchen has extra food stored away. Because LEDs only draw the current they need, your power supply must have an Amperage rating equal to or GREATER than what your LED strip requires.
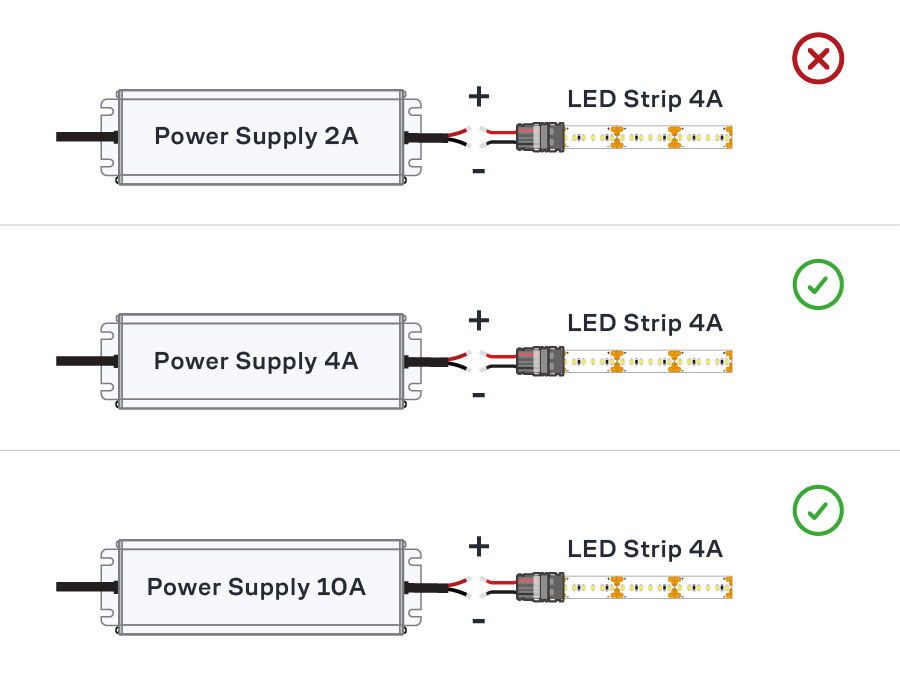
If your custom layout of RGB LED strips needs 4 Amps to run smoothly:
- A 2-Amp power supply will overheat, fail, or trigger a safety shutoff because it's being asked to deliver more than it can.
- A 4-Amp power supply is just right.
- A 10-Amp power supply is perfectly safe. The LEDs will happily draw their 4 Amps and ignore the remaining 6 Amps. Your power supply won't push unwanted current into the lights.
What Is Wattage?
Wattage, measured in Watts (W), is the total electric power consumed by your lights. It is the ultimate metric you'll use to size your power hardware.
Thanks to physics, the relationship between these three terms is governed by a very straightforward math equation:
Wattage = Voltage x Amperage
If a manufacturer tells you their 12V system draws 5 amps, you can quickly find the power: 12 × 5 = 60 Watts.
When buying LED strips, you'll usually see the wattage listed in one of two ways: Total Project Wattage (e.g., "This whole spool uses 45W ") or Wattage per Foot/Meter (e.g., "This strip uses 3 Watts per foot"). If it's listed per foot, you just multiply that number by the total number of feet you plan to install.
Essential LED Wattage Advice: The Derating Rule
Now that you know how to calculate your total wattage, you might think you're ready to buy a power supply that matches that number exactly. Hold your horses! There is one crucial industry insider tip you absolutely need to know: The General Derating Rule.
Think of a power supply like your car. If your speedometer goes up to 120 mph, you wouldn't drive it at 120 mph down the highway for a 5-hour road trip. Your engine would strain, the heat would skyrocket, and you'd drastically shorten the life of your vehicle.
A power supply works the exact same way! To keep your system safe, reliable, and long-lasting, you should never run a power supply at 100% capacity continuously. Instead, you derate it by leaving a safety cushion.
Depending on the specific brand of power supply you choose, the manufacturer will typically recommend one of two standards for this safety cushion:
- The 80% Rule (The Most Common Standard): This is the golden rule for most standard commercial and residential drivers. It means you should only load the power supply up to 80% of its maximum capacity, leaving a 20% safety buffer.
- The 90% Rule (The High-Efficiency Standard): Some highly engineered, premium drivers—like our Zurik™ line—are built entirely differently and are optimized to run at peak efficiency the closer they actually get to a full load. So, we confidently recommend a 90% derating for them, leaving a slimmer 10% safety buffer.
The Wattage Formula Shortcuts
Instead of forcing you to do complex fractions on a scratchpad, the easiest way to apply these safety buffers is to take your total required LED wattage and multiply it by a simple decimal shortcut.
If your power supply manual requires the 80% rule, multiply your total strip wattage by 1.25:
Your Total Strip Wattage x 1.25 = Minimum Power Supply Size
If your power supply manual allows for the 90% rule, multiply your total strip wattage by 1.11:
Your Total Strip Wattage x 1.11 = Minimum Power Supply Size
How to Find Actual Wattage? Real-Life Scenario
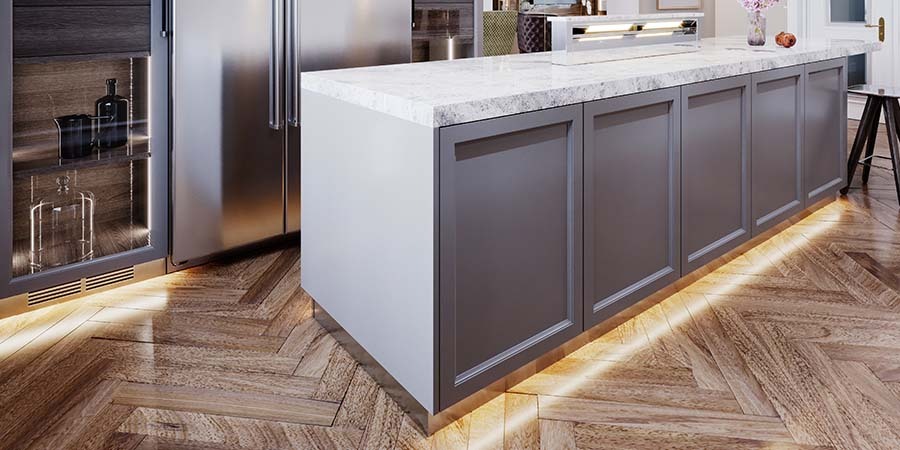
Let's look at a quick, everyday example to see how this plays out in action. Let's say you want to install a beautiful 24V LED accent strip light under your kitchen island toe kicks and plan to power it with a premium driver rated for up to 90% loading:
- You measure the base perimeter and realize you need exactly 24 feet of LED strip tape.
- The product specifications state that the tape lights consume 3.5 Watts per foot.
Step 1: Calculate Total Power Consumption
Following the calculation below, your LED lighting layout will require 84 Watts:
24 feet x 3.5W/ft = 84 Watts
Step 2: Derate Your LED Power Supply
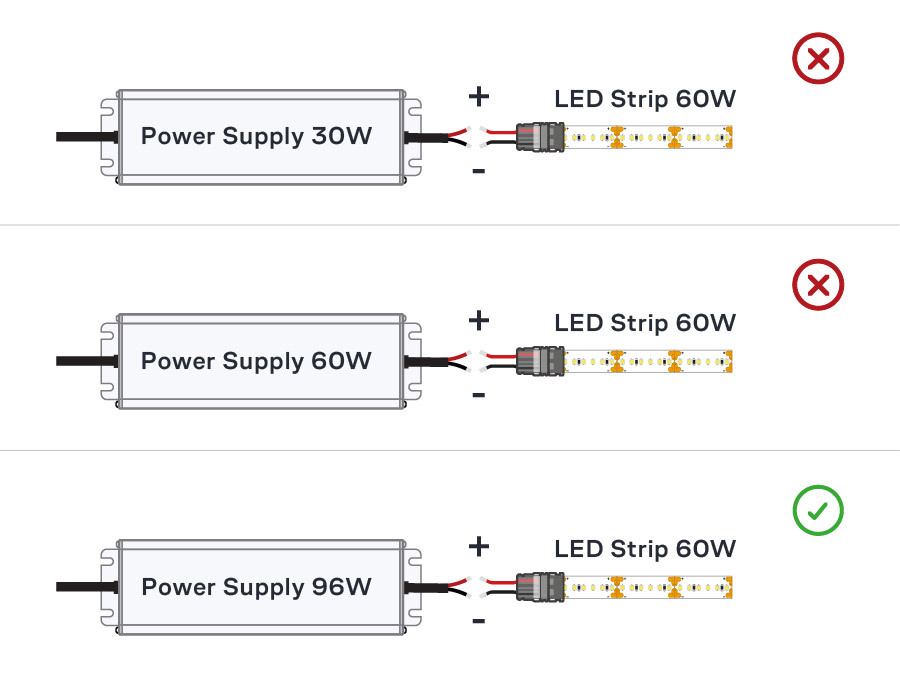
The calculation below shows you need a 24V power supply rated for at least 93.24 Watts. If you browse available power supplies, you'll likely find standard sizes like 30W, 60W, 96W, and 120W. The 30W and 60W units are too small, so you would step right up to the trusty 96W LED power supply. It'll run cool and quiet, and last for years, tucked safely inside or under your bottom island cabinetry.
84 Watts x 1.11 = 93.24 Watts
Extra Lighting Tips for Choosing the Right LED Power Supply
Beyond just numbers, here are a few practical design tips to keep in mind when shopping for power sources for your upcoming home lighting projects:
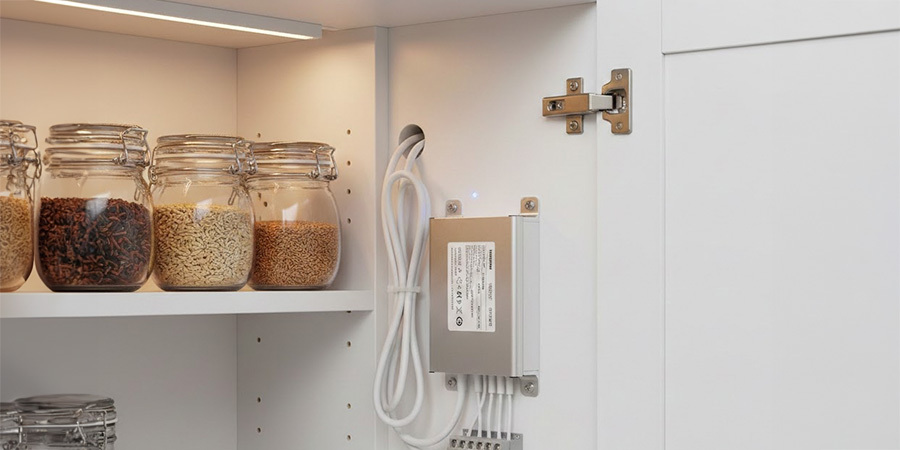
- Breathing Room: At normal room temperature, a quality driver can run at its full rated power. But if it's installed in a tight or poorly ventilated space—like inside a closed cabinet or a cramped ceiling void—heat can build up quickly. When that happens, the driver automatically reduces its power to protect itself. Always leave at least a few inches of open airspace entirely around all sides of the power supply enclosure.
- Ventilation: Ensure the ambient air around the hiding spot has some form of natural ventilation so trapped heat can easily dissipate. And never pack insulation, loose wires, or household storage items tightly against it!
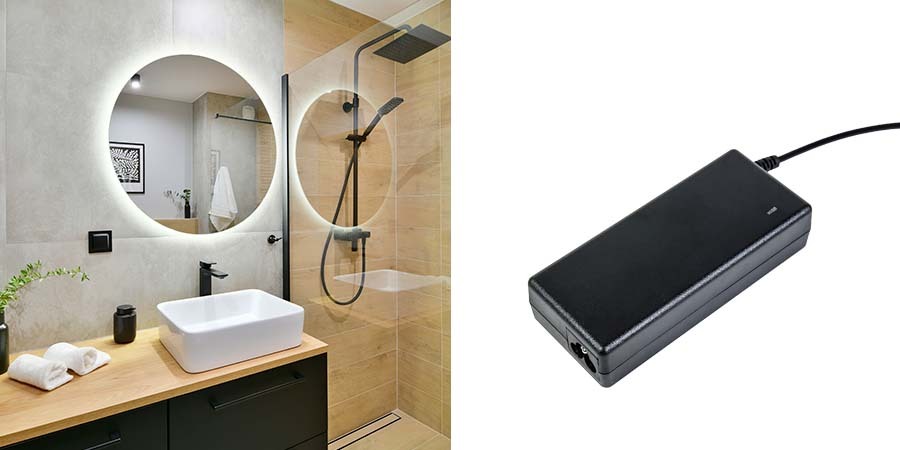
- Environment Matters (IP Ratings): If you are installing lights in a bathroom, over a kitchen range, or outside on a patio, your power source needs to be rated for moisture. Look for an IP67 or IP65 weather-resistant power supply. If it's going inside a dry living room cabinet, a standard IP20 indoor-rated unit is perfectly fine.
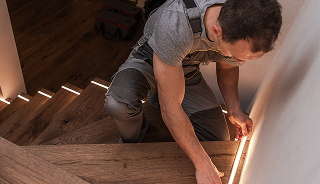
- Physical Connections: There are desktop power supplies that look like black plastic bricks with a wall plug (like a laptop charger)—these are excellent for quick, plug-and-play DIY projects. Others are aluminum enclosures meant to be hardwired directly into your home's electrical junction boxes by an electrician. Choose the style that matches your installation setup.
Flexfire's LED Power Supply Calculator Makes Sizing Easy—No Math Required!
Congratulations! You've officially learned the ins and outs of LED power supplies, voltage, amperage, and wattage. You've also unlocked the secret of the 90% safety rule.
For homeowners who prefer to be hands-on, it's worth understanding the details of every project—even something as seemingly simple as electricity concepts and lighting a room in the house. It helps you avoid being taken for a ride, ask the right questions, and make more informed decisions that reflect your taste, practical needs, and budget.
But let's be honest: Just because you know how to do manual math doesn't mean you want to pull out a scratchpad and a calculator every time you want to add a little light to a room. You've got other creative matters to tend to: designs to build, colors to pick, and spaces to transform. That's exactly why we built our brand new LED Power Supply Calculator Tool.

Instead of worrying about multiplying decimals, figuring out safety headroom, or hunting down conversion charts, our interactive tool gathers all this industry knowledge and puts it into practice for you instantly in a few simple steps:
- Choose the LED strip, specialty light, or fixture that's right for your project.
- Enter the total footage required for your project, if applicable.
- Review your power requirements and our recommended power supply.
- Finalize your power supply selection and get ready to install with confidence.
In a few clicks, our smart calculator does the heavy lifting! It also automatically applies the derating safety cushion and recommends a Class-2 power supply whenever possible. It takes the guesswork entirely out of the equation so you can skip the math and head straight to the fun part—enjoying the glow of your beautiful new lights. Head over to our calculator page now and try it out for your next project!
