
How to Use Hidden LED Lighting for Maximum Visual Impact
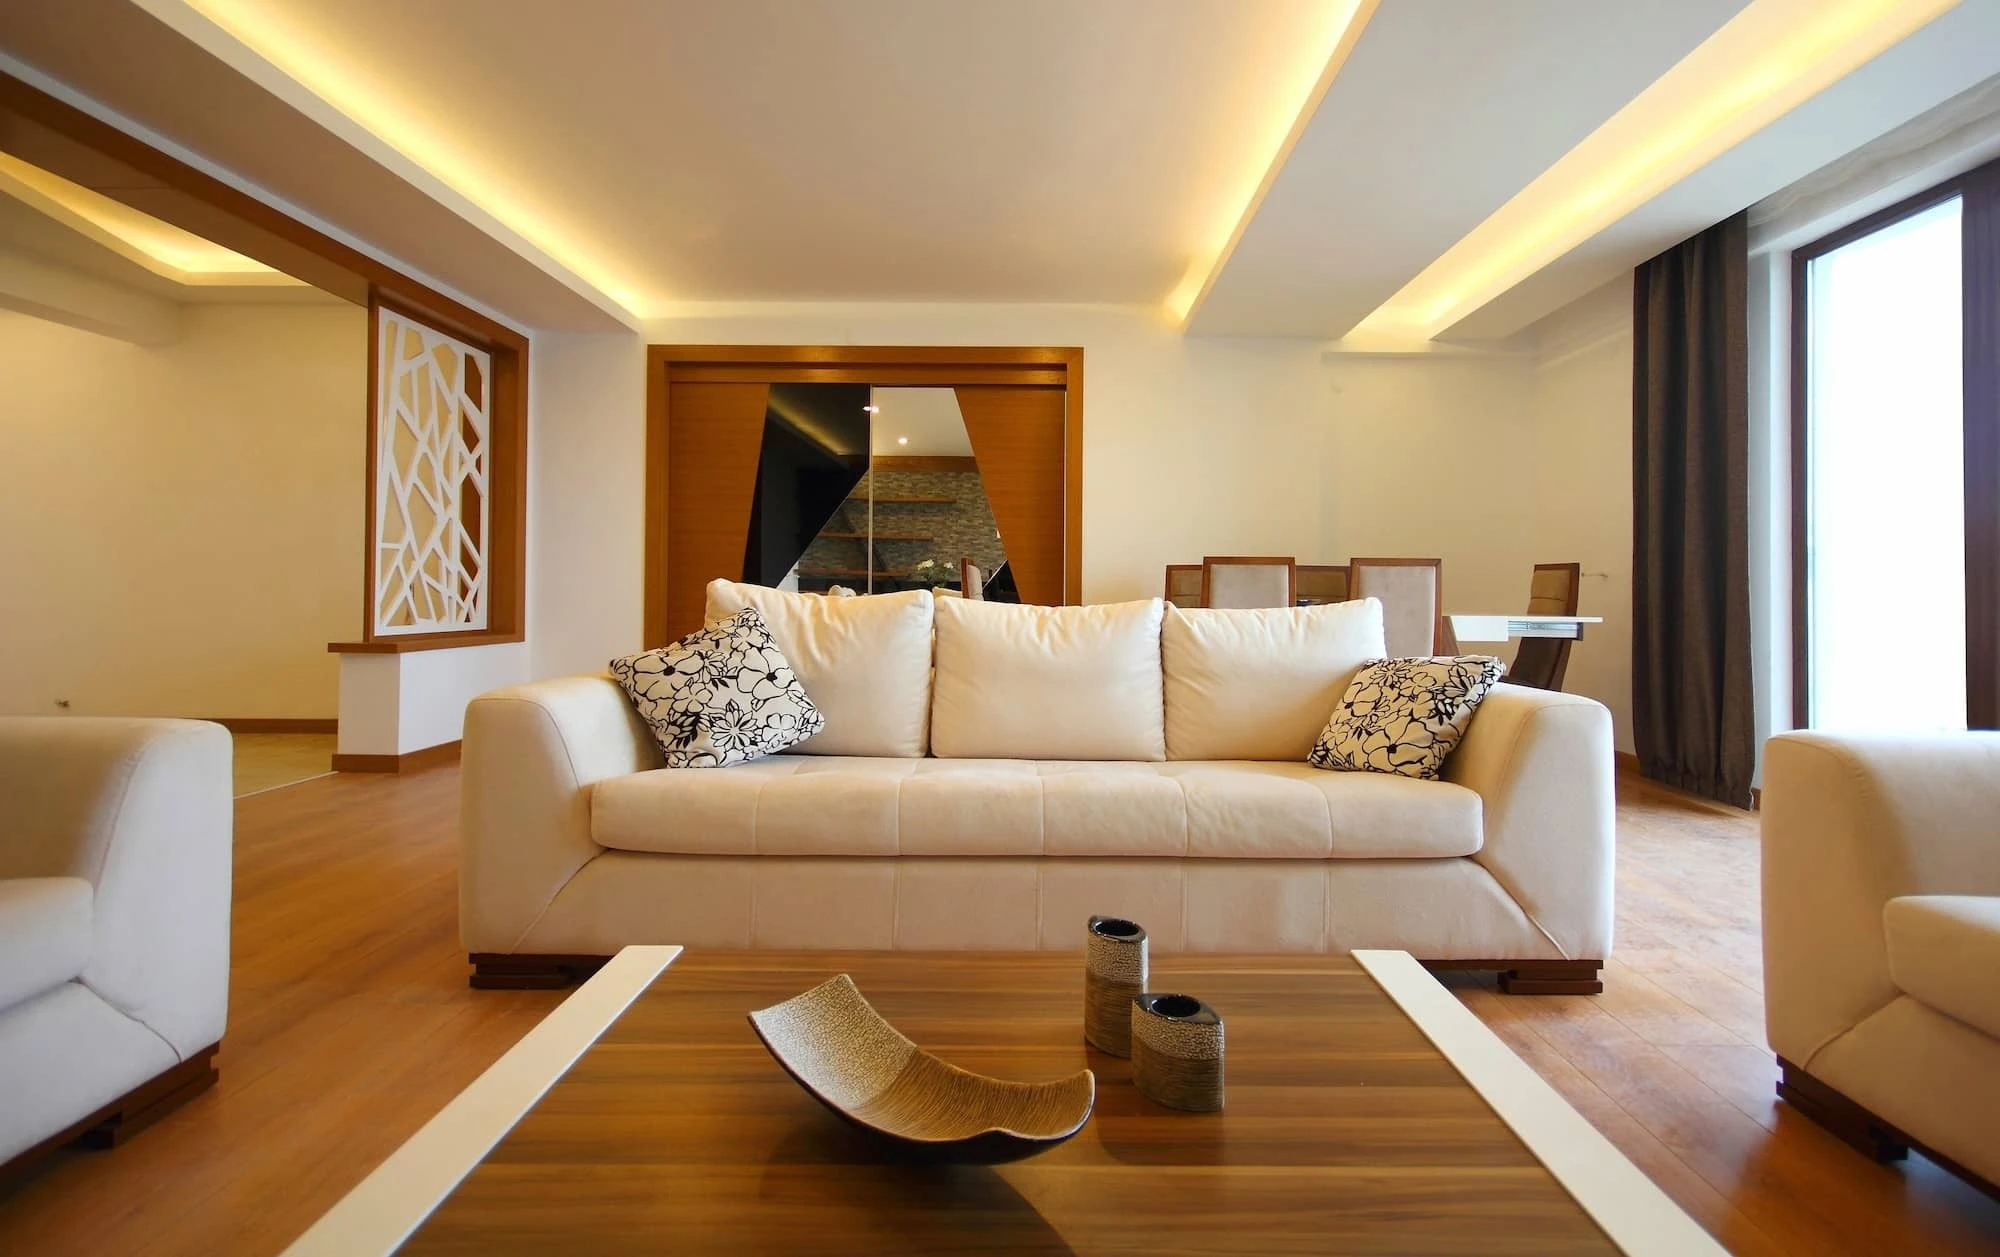
The most memorable lighting in a well-designed space isn't always a flashy chandelier or luxury lamp. Often, it's a light without a visible source. Guests see a warm wash of light across a ceiling, with no fixture in sight. A floating shelf appears to hover in its own glow. A stone wall radiates light evenly from behind without a track in the frame.
Hidden LED strip lighting can create these unforgettable looks by placing the strip out of direct line of sight and letting the reflected or diffused glow do all the work. There are many ways to use hidden LED strips, but the three most common are cove lighting, underlighting, and backlit or edge-lit indirect glow.
Cove Lighting: Hiding the Source in the Architecture
A cove is a recessed architectural ledge or channel near the ceiling, typically formed by a soffit, drop ceiling, or built-out detail. LED cove lighting strips are installed inside the cove, facing upward, so the light is directed across the ceiling rather than down into the room. The LED strip sits inside the recess, invisible to anyone standing in the room.
You can achieve different looks with cove lighting, depending on several installation factors:
- Depth of the cove: You need enough front-to-back room in the cove to fit the strip, channel, and any wiring while still keeping the lip able to conceal it from view.
- Height of the lip: The lip should extend far enough below the strip to conceal it from view.
- Distance between the strip and the ceiling: The farther the strip is from the ceiling, the more the light can spread. Adequate space gives you a smoother, more even wash.
Channel selection is an important part of cove installations. A frosted diffuser lens spreads the light and softens visible LED pixelation or unevenness before the light reaches the ceiling. For coves where the strip will be installed closer to the ceiling than would be ideal, use a wider-angle lens to help reduce banding.
Underlighting: Furniture, Counters, and Elements That Float
Underlighting creates the impression that an object is hovering. You can create this illusion by mounting an LED strip beneath a floating shelf, bar counter, bed frame, or cabinet base. When the light is directed down and out, it creates a glow on the floor or wall, and whatever is above it looks like it's floating.
There are a few ways you can use underlighting in your design:
- Toe-kick lighting: This is the most common use of underlighting in residences. Mount a low-profile channel in the base of a cabinet to get a glow running across the floor. During the day, this is a subtle detail, but in the evening, when the overhead lights are dimmed, the effect is striking. Not only does it create a beautiful effect, but it also puts out enough light for people to find their way without turning on bright lights.
- Floating furniture effects: When you scale up the toe-kick lighting, you can take the illusion to another level. A strip mounted to the underside of a bed frame, a media console, or a freestanding sofa produces a soft halo of light on the floor beneath the piece. It makes the entire space look intentionally designed rather than purely functional. The furniture now becomes a feature in the room.
- Bar counters, reception desks, and commercial casework: A strip beneath the front fascia of these pieces sends light down across the floor in front of them. This effect creates a layered lighting look without adding a visible fixture.
Backlit Panels and Indirect Glow
Backlighting places the LED strip behind a surface, allowing light to pass through or around it, producing a glow from within the material. Stone, glass, acrylic, and certain wood veneers respond well to backlighting when the material has sufficient translucence and consistent thickness.
What can make or break backlit panels is the standoff distance. If the space between the strip and the panel surface is too small, you get visible LED hot spots on the surface. If you have too much space, you can lose the glowing effect completely.
As a general rule, the standoff distance between the strip and the panel should be at least 1.5 times the LED pitch (the spacing between chips along the strip). The right standoff for your project will depend on the pitch of the specific strip you're using, so confirm the exact distance against your strip's spec sheet. From there, you can adjust depending on how translucent your material is or how bright you want the light to be.
Frosted diffuser lenses on the channel reduce the standoff distance required for an even output by spreading the light before it leaves the channel. This lens can be a great solution if your project doesn't have enough room for the right standoff distance.
Edge-lit lighting takes a different approach. Instead of mounting the strips behind the panel, they go on the edge, usually at the top and bottom. The glass or acrylic then guides the light across the surface. This approach works well for glass shelving, illuminated signage, display panels, and translucent reception desk fascias.
For all indirect glow applications, it's critical to keep a consistent color temperature. Variations in CCT between strips or batches make the light appear uneven and can produce visible color banding across the panel, which is difficult to correct without replacing the affected strips.
The Technical Decisions That Make Hidden Lighting Work
Concealing the strip is only part of the process. You also need to choose the right hardware to support the system and ensure it's hidden as well. A few decisions built into the spec before installation begins can save you time and money later.
Before you close up your cove, toe-kick, or panel assembly, make sure you place the driver. Every LED strip run needs a driver, and the driver should be hidden from view somewhere easily accessible for future maintenance.
Junction boxes recessed into ceiling cavities, panel assemblies, and cabinet interiors are common solutions. You can also simplify installation and future service on multi-run projects by consolidating the drivers into a single, concealed location.
24-volt systems are strongly recommended for most hidden lighting applications. Voltage drop across longer runs can make the strip obviously dim near the end. If you have a cove or backlit panel that relies on even light, you need a system that's up to the task.
Specify the dimmer and driver together to get the full range of flicker-free dimming. If your strip is flickering when the output is low, it's immediately noticeable. It's much easier to select the right dimmer and driver at the spec stage than to correct them after everything is installed. Work with a supplier who can help you specify compatible drivers, dimmers, channels, and strip configurations before installation begins.
Hidden Lighting Works Best When It's Planned Early
The most effective hidden LED lighting disappears into the architecture while shaping how the entire space feels. Whether you're building a soft ceiling glow with cove lighting, creating floating furniture effects with underlighting, or illuminating translucent materials with backlighting, the success of the installation depends on careful planning long before the strips are switched on.
Proper spacing, channel selection, diffusion, driver placement, and dimming compatibility all work together to determine whether the final result looks seamless or distracting. When these technical details are handled correctly, hidden LED lighting becomes one of the most powerful tools for adding depth, atmosphere, and visual impact to a space without drawing attention to the fixture itself.