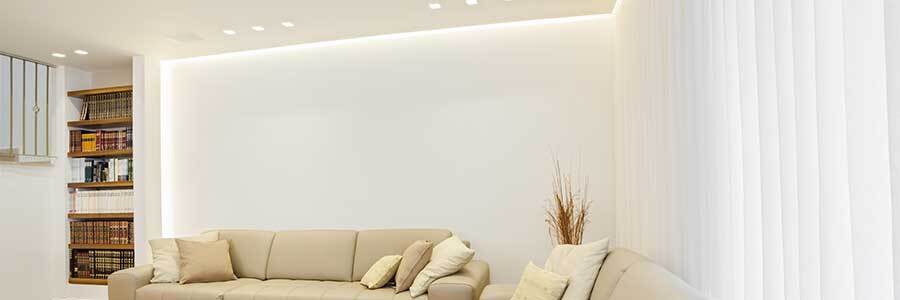

How to Install LED Cove Lighting in a Living Room?
Cove lights are key to modern living room lighting. Learn how to install bright indirect lighting in your living room cove using LED fixtures and strips.
- -Living room cove lighting embraces modern lighting design by providing concealed, indirect illumination that replaces harsh overhead lights.
- -The ideal cove light should be fully dimmable, tunable white or CCT-selectable, diffused, and bright enough to serve as ambient lighting.
- -Both LED strip lights—a DIY-friendly solution—and purpose-built 120V cove fixtures installed by an electrician are excellent choices for living room cove lighting.
It’s 8:00 PM on a Friday after a long week of staring at not-so-eye-friendly screens. You’re finally ready to let your eyes rest by unwinding on the living room couch, only to realize your choices are either total darkness or classic ceiling lights: harsh, extra-bright recessed cans or oversized statement pendants that feel like stadium reflectors.
In the spaces where we go to recharge, where we naturally head to after kicking off our shoes, we usually want ambient light that simply lets us be: sufficiently bright to fill the room, yet soft enough to avoid glare. Traditional ceiling lighting rarely strikes that balance. Instead, it shines straight down, creates harsh shadows, and tries to convince us that work isn’t finally over.
That’s exactly why cove lighting has become the gold standard for this space. It creates a living room bathed in a soft, floating glow that visually raises the ceiling, offers a refined custom-built feel, and provides exactly the kind of light you want to live and rest under (not just see by!)
Whether you're retrofitting crown molding or installing LED fixtures into a tray ceiling, this guide will briefly walk you through creating pro-looking living room cove lighting.
What Are the Benefits of Cove Lighting?

Before grabbing a ladder, it helps to understand what you're actually gaining from indirect architectural lighting in this area compared to traditional lamps or overhead fixtures:
-
- Making Your Room Feel Massive: When light bounces off the ceiling, your eyes are naturally drawn upward. This visual trick eliminates dark ceiling shadows, making standard 8-foot ceilings feel significantly taller and giving small or medium living rooms an open, airy visual footprint.
- No-Glare Activities: Have you ever watched a movie with an overhead light reflecting off the screen—an even bigger nightmare during horror films or moody scenes? Or played Monopoly with the glare of a ceiling light bouncing off the board and straight into your eyes? Cove lighting completely hides the light source from your direct line of sight.
- Clutter-Free Install & Space: It pairs beautifully with other concealed features, such as living room shelf lighting and floor-level applications. Its hidden installation area also makes the project surprisingly easy to work with, providing plenty of room to route cables, conceal drivers, and organize other components. The result is not only a cleaner installation, but also a more refined living room free from bulky, visible lighting hardware.
- A Designer Look Without a Crew: A decade ago, custom cove lighting meant hiring a carpenter to build expensive architectural soffits and paying an electrician thousands for complex wiring. Today, low-voltage LED strip lights make it possible to achieve the same high-end look in a single DIY weekend LED project using just a few basic tools.
What is the Best Lighting for a Cove?
Because cove lighting depends on light reflecting off your ceiling or walls, low-quality LEDs can quickly ruin the entire effect and make your living room lighting look basic. Cheap strips often produce an unpleasant bluish tint, flicker over time, or create uneven patches of light.
They're also more likely to fail prematurely, which isn't just frustrating but a safety concern. Whether it's you, whoever cleans your home, or anyone else maintaining the space, nobody wants to be climbing onto a step stool every few months just to troubleshoot the lights.
To get a seamless, architectural wash, make sure to purchase from a high-quality LED lighting manufacturer. Beyond that, keep these key features in mind when choosing from the wide variety of LED options available:
Tunable White: Circadian Lights Are a Must
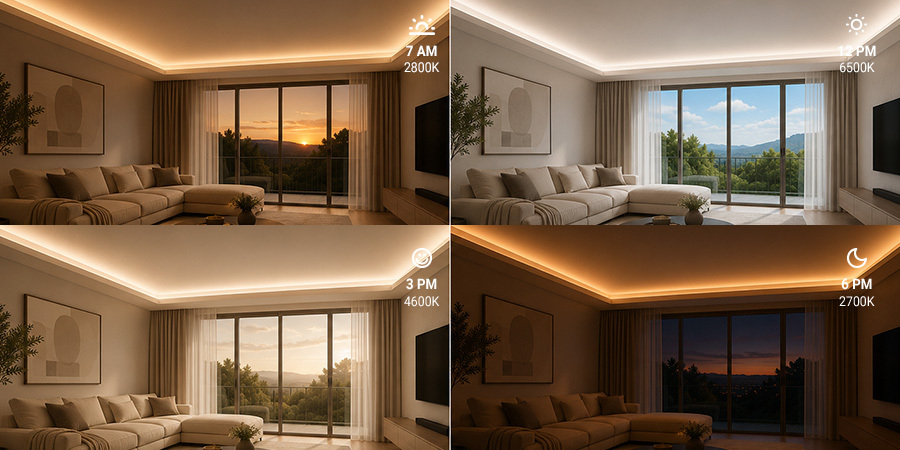
While plain white lighting has long been the standard for living rooms, today's approach recognizes that this space serves many different purposes. Gone are the days when the living room was reserved exclusively for entertaining guests or kept spotless and unused. Today, it's where we answer emails and meet with friends for book clubs or game nights, and where our children tackle homework and host sleepovers or birthday parties.
That means your lighting needs to change throughout the day. You might want bright, energizing light for computer work or reading at 10:00 AM, more neutral lighting for an afternoon couch nap or some quiet downtime early in the evening, and an even cozier glow for enjoying a drink alone or with friends at 9:00 PM. Fortunately, one lighting solution can do it all.
That solution is tunable white lighting. It's ideal for your living room's cove lights—your main light source, the fixture that's on for nearly every activity and the one you think of as the light in the room. Paired with the right smart lighting system, it can automatically adjust to follow your circadian rhythm: warm light to ease you into the morning and bedtime, neutral light during transitions, and cooler light when it's time to work, clean, or stay alert.
2700K vs. 3000K: Warm White Always Goes First
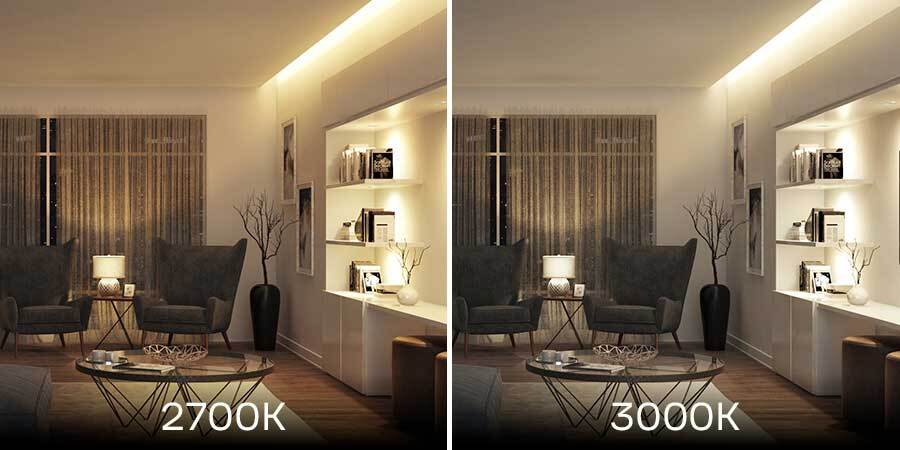
Sometimes, whether it's because of budget or because you simply prefer more straightforward lighting controls, sticking with one white color temperature is the right call. For living room cove lighting, that choice should almost always fall somewhere between warm-neutral and warm white. After all, the living room is first and foremost a space for relaxing, socializing, and slowing down—even if it occasionally doubles as a home office.
So which white color temperature should you pick? Here are the most reasonable options:
-
- 3000K: A clean, balanced warm white. Choose this if you have modern white or light-gray ceilings and walls, as it maintains crisp ceiling colors without feeling hospital-like.
- 2700K: More of a golden glow. Choose this if your living room features dark wood trim, leather furniture, or warm-toned paint, and you primarily use the room to rest after dark.
High-Brightness LED Output
Because indirect light loses energy as it bounces off your ceiling, low-powered accent strips will leave your cove looking like a faint, barely-visible line. Look for a high-density option—meaning, there’s less spacing between each individual LED—that generates a solid brightness level so your cove acts as a true source of general illumination for the room.
As a rule of thumb, aim for LED strips producing around 500–700 lumens per foot, or LED lighting fixtures delivering roughly 2,000–4,000 lumens, depending on your room size and layout.
Diffused Lighting
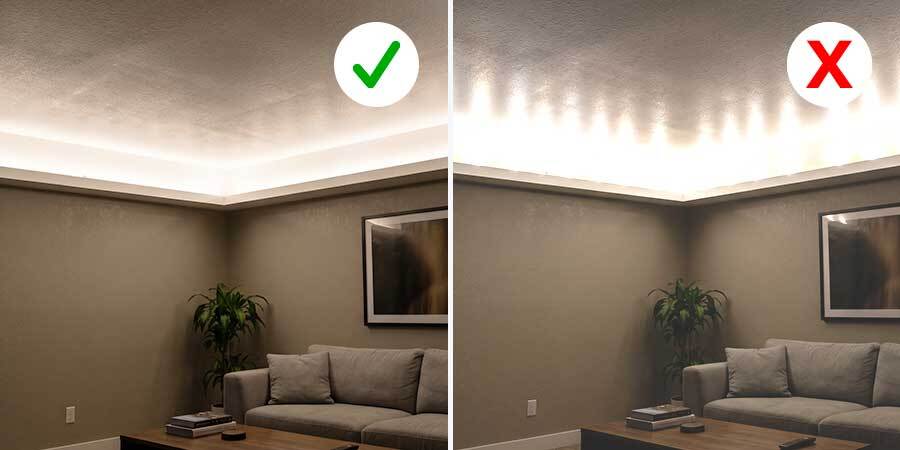
Have you ever seen a cove installation where you can count every individual glowing LED reflected on the wall? Those are called 'hotspots,' and they completely ruin the illusion of a soft, floating ceiling. They can also make the ceiling look dirty, easily mistaken for stains or dents. And if your home features hand-painted tray or vaulted ceilings, hotspots will only distort and distract from the craftsmanship.
As with brightness, the solution starts with high LED density, which creates a more continuous line of strip lighting. For an even smoother result, install them inside an aluminum channel with a frosted or matte finish, or even a light diffuser. Together, these elements blend the dots into a seamless beam before the light reaches your ceiling.
There's another benefit too. Because cove lighting sits in one of the hardest places in the room to reach, these encasings also make maintenance easier. They protect the LEDs from dust buildup, are much easier to wipe clean than exposed strips, and help keep the most visible room in your home looking polished for years to come.
Full-Range Dimming
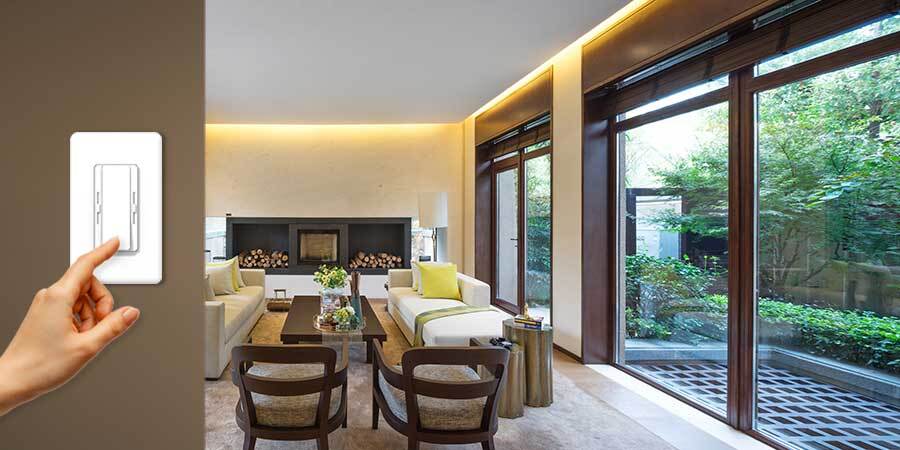
A cove lighting system without a cutting-edge dimmer is a missed opportunity. Smooth, full-range dimming lets you turn the lights up to 100% when you're cleaning up after a party or need extra complementary backdrop brightness for your task lights while reading the newspaper. Then, with a single adjustment, you can dim them to just 1%: enough to find your popcorn or soda during movie night without taking away from the true theater experience.
How to Fit Coving with Lights?
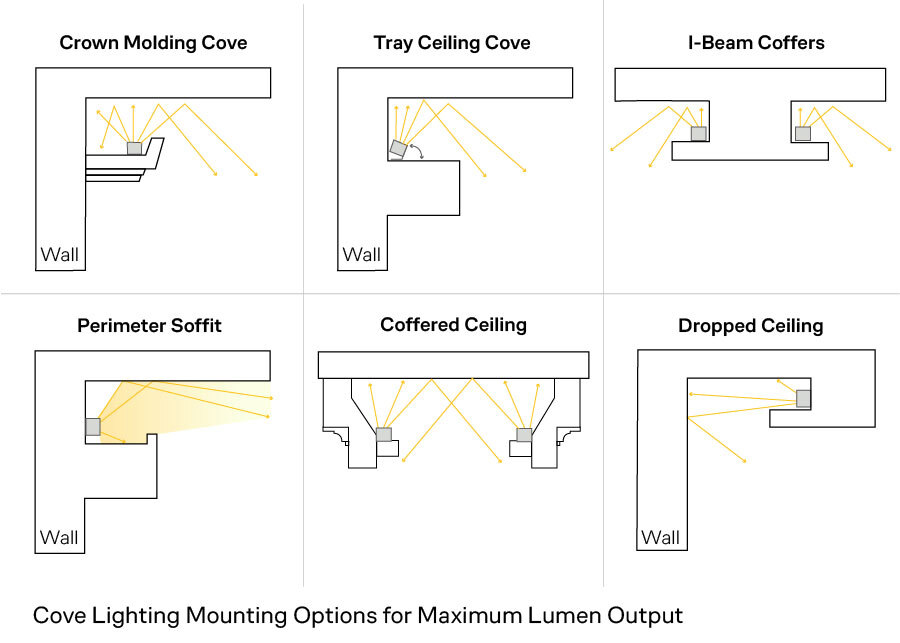
Before installing your lights, you need to match your lighting setup to the specific layout of your living room's architecture:
-
- Crown Molding Cove: Crown molding is mounted 2 to 4 inches below the ceiling line, creating a hidden pocket where LEDs sit and project light straight up.
- Tray Ceiling Cove: LEDs sit along the interior ledge of a raised tray ceiling, casting light inward across the center panel to make the ceiling look weightless.
- I-Beam Coffers: Tucked into the upper channels of decorative or structural ceiling steel beams typical of industrial-style lofts, washing both sides of the ceiling bay evenly.
- Perimeter Soffit: A lowered ceiling perimeter creates a hidden ledge that directs a soft wash of light across the main ceiling.
- Coffered Ceiling: LED light sources are concealed within the upper recesses of decorative ceiling coffers or beams found in mansions and old-style manors, evenly illuminating each ceiling bay.
- Dropped Ceiling: A lowered section of the ceiling creates a concealed ledge where LED strips wash light across the main ceiling, producing a clean, continuous glow.
Option A: Architectural LED Strip Lighting (Modern Linear Lighting)
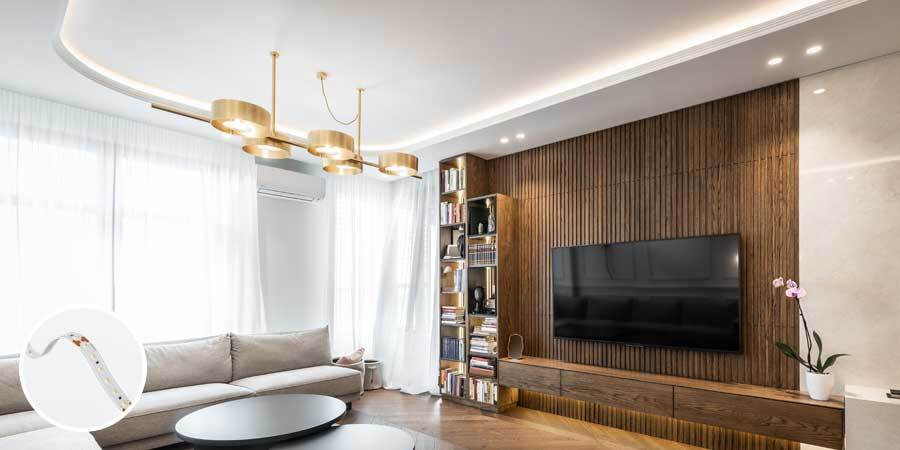
If your cove space is tight—like inside slim crown molding or a shallow architectural groove—flexible, high-brightness LED strip lights are your best bet.
LED Cove Lighting Installation: Strip Lighting Checklist
To bring this living room strip lighting setup to life, your shopping (or “I think I already have this somewhere in the garage”) list should look something like this:
☐ Architectural Series LED Strip Lights
☐ Compatible LED Power Supply (LED Driver)
☐ Dimmable Low-Voltage Wall Switch or Controller
☐ Aluminum Mounting Channel (with Frosted Diffusers)
☐ Low-Voltage In-Wall Rated Wire
☐ Wire Strippers & Electrical Tape
☐ Drill, Screws & Mounting Clips
Step-by-Step Strip Lighting Setup
Ready to bring your cove to life? While every ceiling design is a little different, most LED strip installations follow the same basic steps:
-
- Measure Your Perimeter: Measure the length of each cove run, identify where the wiring will enter the cove, and plan a hidden, well-ventilated location (like a closet, cabinet, or wall cavity) for your low-voltage power supply.
- Mount the Aluminum Channels: Secure the channels along the cove ledge. If possible, angle them slightly toward the center of the ceiling (some coves point straight up, others at 30°, others at 45°) to maximize the reflected light.
- Test Before Installing: Connect the LED strips to the driver and verify that every section lights properly before removing the adhesive backing.
- Adhere the LED Strip: Prepare the channel by cleaning it thoroughly, then peel off the backing and firmly secure the LED strip in place.
- Connect the Wiring: Route the low-voltage wire back to the driver, making sure to observe the correct polarity markings (+/-). Power the system one final time to verify everything works as expected.
- Snap on the Diffusers: Slide the frosted covers to soften the light, eliminate visible LED dots, and protect the strips from dust.
- Plug In, Fine-Tune & Enjoy: Turn everything on and make any final brightness or color adjustments. Once everything is ready, the lighting bouncing off your ceiling should feel subtle yet powerful—not overpowering—while making moving through the living room clear and easy.
Why It Works: Designed specifically to disappear into the architecture itself, these ultra-thin light spools conform to long runs and corners while remaining virtually invisible once installed. The only thing you notice is the smooth, indirect glow they cast across the ceiling, making them the preferred solution for modern cove lighting. There are even ultra-thin versions available!
Option B: Line Voltage Fixtures (LED Cove Lighting Fixtures)
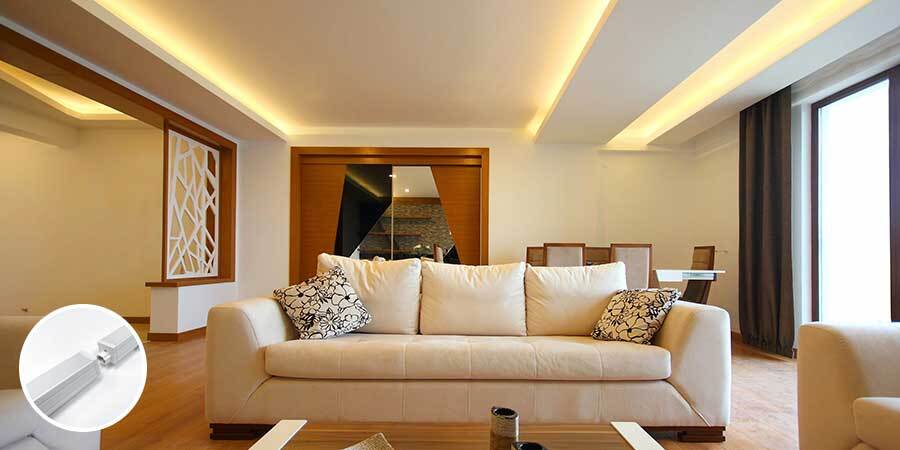
For larger living rooms, long perimeter runs, or homeowners who prefer to leave the electrical work to a licensed electrician, direct 120V LED cove fixtures are an excellent option. Unlike low-voltage strip systems, they connect directly to line voltage, making them a straightforward solution for larger installations without the need for a separate remote power supply.
LED Cove Lighting Installation: Light Fixture Checklist
Your shopping list for a specialized cove fixture will look a little more technical and specific than an LED strip’s, given that they’re not usually DIY-approved products:
☐ Endeavor™ 120V White LED Cove Light Fixtures
☐ Direct 120V Connectors or Jumper Cables (Endeavor™ accessories)
☐ Dimmable 120V Wall Switch
☐ Adjustable Mounting Brackets (Included with Fixtures)
☐ Wire Strippers and Electrical Tape
☐ Drill and Screws
Step-by-Step LED Light Fixture Setup
One of the biggest advantages of 120V cove fixtures is their streamlined installation. In general, the process looks like this:
-
- Locate Your 120V Power Source: Identify the nearest 120V junction box or switched circuit that will feed your cove lighting. Because these fixtures connect directly to line voltage, there's no need for a separate remote power supply or transformer.
- Install the Mounting Brackets: Secure the manufacturer's mounting brackets evenly along the cove. If your fixtures feature adjustable aiming, set them to direct the light toward the ceiling for the smoothest wash.
- Mount and Connect the Fixtures: Snap the fixtures into the clips and connect each section using the supplied connectors or linking cables to create one continuous run.
- Wire the Lead Fixture: Connect the first fixture to your 120V switched circuit, following all local electrical codes and observing the manufacturer's wiring instructions.
- Test & Fine-Tune: Turn the power back on, verify that every fixture illuminates evenly, and make any final aiming or CCT adjustments before considering the installation complete.
Overall, this sequence mirrors what your electrician would actually do while remaining simple enough for you—as the homeowner, planner, and future enjoyer of the results—to fully understand and remain in charge of the process.
Why It Works: Many come with an integrated diffuser, eliminating the need for separate aluminum channels and covers. Some models are even CCT-selectable, allowing you or your electrician to fine-tune the brightness and white color temperature on site before the installation starts.
Final LED Tips & More Cove Lighting from Flexfire!
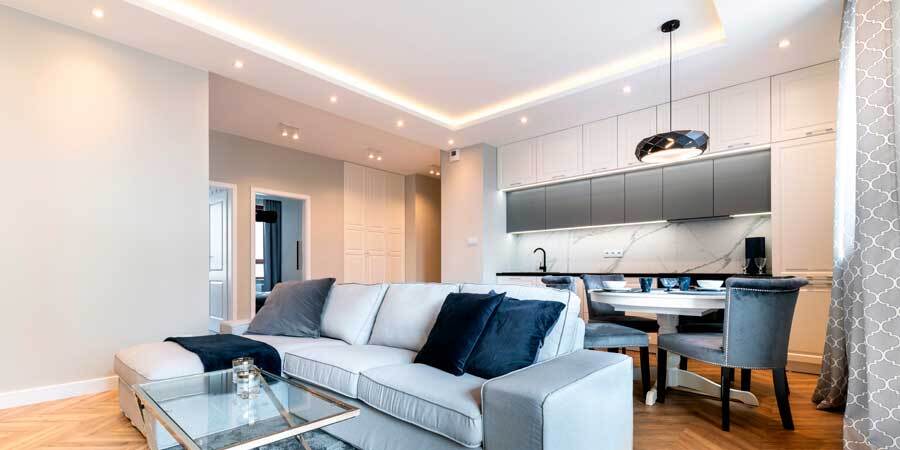
Modern LED lighting has done more than make fixtures smaller and easier to install—it has expanded the possibilities of what we can illuminate in a living room. Today, the ceiling is no longer just a structural element above your head, but one of the room's defining design features. That's what makes cove lighting such a powerful addition to any set of living room lighting applications, and why it's a technique well worth mastering.
Before you put your tools away, keep these final pro tips in mind:
-
- Do the Sofa Sightline Test: Before fastening everything permanently, sit in your favorite spot on the sofa. Make sure the LED strip or fixture remains completely hidden behind the cove so the light (and not the source!) is all you see.
- Plan for Easy Dusting: Because coves face upward, they naturally collect dust over time. Choosing profiles with smooth housings makes routine cleaning much quicker.
- Layer Your Lighting: Let your cove lighting establish the space’s ambient glow, then complement it with other lighting layers: floor or table lamps, backlit stone coffee tables, under-sofa lighting, and many others.
With projects like these, the sky isn't the limit… The ceiling is! And with Flexfire's team of lighting experts by your side, even the highest ceilings become an opportunity to create something extraordinary. Contact us today, and let's design a living room you'll love looking up at.